Showing posts with label segments. Show all posts

Saturday, July 20, 2013

Geometry: Special Right Triangles

Pg 10. Rationalize Square Roots

Before we dived into Special Right Triangles, I though we'd go over rationalizing square roots. This went much smoother this year than in the past because my students were familiar and comfortable with square roots and simplifying them. Surprisingly, most of the students took this very well and rationalized square roots like it was nothing! (Still amazed!) It has been such a struggle in the past.


Pg 11. Special Right Triangles

This has always been my toughest area to teach to my students, until this year. When it was all said and done, I confessed to my students that this is one of the hardest concepts/lessons for me to teach. Then, they blew my mind. My students told me this was the easiest thing they've done so far and loved it. Throughout the rest of the year they chose to use the special right triangles method to solve most other problems over trigonometry!!

I think that part of reason for this is the method I used to teach this concept. I pulled several resources for notes, guided practice, and independent practice. I worked all problems myself to identify a pattern to the differing levelss of questioning. After this, I taught each question type as a lesson by itself.

For 45-45-90, I focused on finding the legs first and then the hypotenuse.

For 30-60-90, I began with the questions that required simple mathematical relationships in order to solve and then we worked up to the questions involving rationalizing.

We would work out an example with extensive explanations, then complete a student let guided practice. For the independent practice, I encouraged them to work as a team and I graded them immediately. I actively monitored for independent and collaborative work and I made sure to intervene when I saw attempted cheating.

Special Right Triangles

Cover:

Deriving the formulas:

Lesson examples:
Guided Practices: These were folded and tucked behind the above notes that were glued down like a pocket.
For each question, you'll notice a select number of homework problems. I assigned what my students thought was randomly selected problems. I would assign a small two to three problem practice and then the next day come back and do one to two more or the same. In the end, we completed the worksheet.

Honestly this whole journal page probably took us four or five days to complete. We looped through lesson, guided practice, and independent practice for each type of question. I felt that this was an important tool needed later for properties and measurement of two and three dimensional shapes.

Usually, the lesson using trigonometry to solve right triangles is introduced here. However, this lesson hit right before Christmas break. I looked through upcoming units and decided that I could make up the lessons and concept in Unit 8 Measurement of Two Dimensional Figures. It turned out great! Not sure if I will keep it this way next year or not. I guess it depends on timing.

This is a page from my second year journal.

Optional Pg. Right Triangle Solving Strategies

This foldable was used after the lessons on Trigonometry to summarize the strategies used to solve right triangles.


Geometry: Pythagorean Theorem

Pg 6. Right Triangle Basics (Optional - Used this my second year, but not my third.)


Pg 7. Pythagorean Theorem

LEFT: We took a square piece of paper and folded it until the entire square is made up of small right triangles. We then selected a right triangle and the three surrounding squares to demonstrate the Pythagorean Theorem.

RIGHT: Another time, we selected, drew, and then cut out the diagram to demonstrate the Pythagorean Theorem.

I have seen other diagrams using all the pieces to make a square, but I have yet to understand them or see the purpose. Any suggestions for enlightening resources?

Pg 8. Pythagorean Theorem and It's Converse

This next year, I will use Anglegs and worksheet to introduce and classify triangles.

My students came with excellent prior knowledge of the Pythagorean Theorem.

Pg 9. Multistep Pythagorean Theorem


Friday, June 28, 2013

Geometry: Transformations on the Coordinate Plane

Pg 12. Transformations


I pulled the information from the given website and typed this assignment.

Pg 13. Translations

Pg 14. Reflections


Pg 15. Rotational Symmetry

Pg 16. Rotations

During my third year, I implemented a new strategy for transformations.

Materials needed:

  • paper coordinate grid
  • coordinate grid on a transparency
  • push pin
  • piece of cardboard

Plot the original image on the paper grid.


Layer materials:

  1. cardboard
  2. paper
  3. transparency

Using a dry erase marker, copy/trace the original image; then using the transparency, complete a selected transformation. For translations, slide the transparency. For reflections, flip the transparency about the line of reflection. For rotations, turn the transparency in the desired direction and degree. Use the push pin to poke holes through the transparency, paper, and cardboard to mark the resulting image coordinates. Remove the transparency, and replicate the pre-image.

Pg 17. Dilations

Pg 18. Transformations Booklet
OBJECTIVE: This is another one of those 'create your own' projects. Students are given a grid and asked to plot a triangle of their own. I always use points that create a scalene triangle that does not have horizontal or vertical sides. I love watching students throughout this project because they see other's results and begin to connect patterns.

One year, I completed each section after each lesson and practice for the four transformations. The next year, we completed the entire booklet after all four lessons and practices were done. I'm not sure which had a better result. I think that the sequence depends on the level the students are performing at.

We then wrote a translation statement and completed a table using notation. I think students graphed first and then we completed the table. Graphing is easier for students because it it visual and kinesthetic.

We completed dilations after reflections and rotations.

I do remember stating at the beginning, that if you feel daring, then plot across the axes; however, if you are not sure, then keep it in a single quadrant.


Tuesday, June 25, 2013

Geometry: Types of Lines and Relationships

Pg. 7. Lines, Line Segments, and Rules

Original Foldable: Pocket Book


This foldable takes a looooonnnnggg time to complete. I suggest finding another strategy. Suggestions?

QUICK CHECK FOR UNDERSTANDINGS: Book foldables may be time consuming, but they can be reusable. I had my students pull out all cards from the books, mix them up, and match them back to the correct pocket. It is easier to have them compare to a neighbor and monitor their results closely. I really like the disscussions that arise from who's right and wrong.


QUICK AND EASY: 'Types of Lines' foldable:

Line

Segment

 
Ray
Perpendicular

Haven't figured out how to work parallel into this.

This is one of my favorites. I had a student struggling with this concept at Sylvan. We created this foldable in under two minutes, had a one to two minute reteach, and she mastered the concept. She still has this in her folder and enjoys teaching other students that struggle.

This is paired with another trifold foldable in my journal.


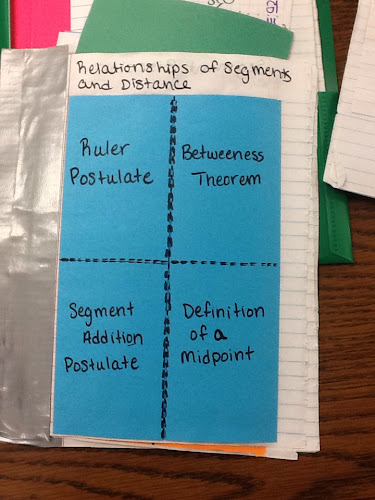
Pg. 8. Relationships of Segments and Distance


Pg. 9. Segment Bisector (this is a trifold)