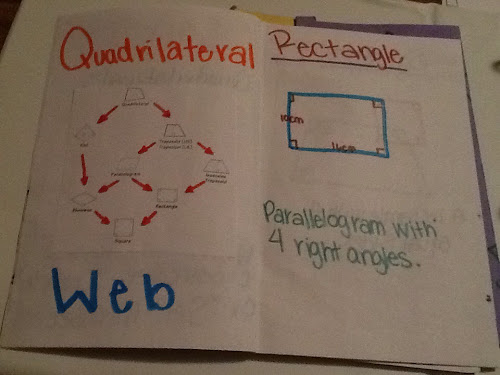
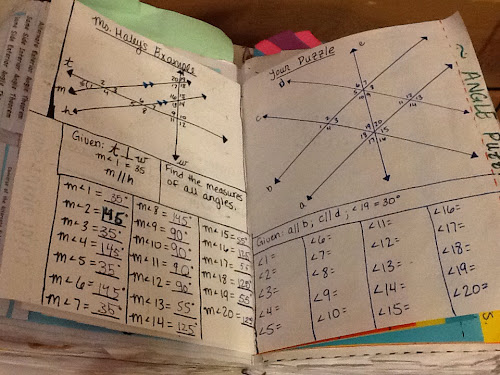
Questions: How do you create a journal page or foldable? Where do you start? How do you come up with it?
I'm not sure if I've written about this yet, but it is definitely on my mind quite a bit. My second year co-teacher always asked, "How do you come up with this?"
The answer to that question has been on my mind all through my third year of teaching. So let me see if I can lay it all out.
Step 1: I start with a general objective, select an assignment, and check to see that it aligns with the quiz and unit assessment.
This strategy evolved from the curriculum director at my previous school. "Keep the end in mind." When planning you want to continually loop through and keep the assignment, quiz, and assessment in mind as you plan a journal page, lesson, activity, etc.
I have several EOC prep books that I use for quizzes and the CSCOPE curriculum for unit assessments. I always start by taking the quiz or assessment myself. I work each problem in as many different ways as I can and note each strategy used. The hardest strategy for me to see is always the logical approach. Usually, this method comes out during the lessons from my students. I know that this idea looks and feels like teaching towards a test, and it probably is, but I do what I can.
Step 2: Now that I know what we're working towards, I take the concept, topic, or objective and begin my research. I look online mostly, reference CSCOPE curriculum, Glencoe textbooks, EOC prep guides, colleagues, etc. I try to reference a minimum of four to make sure I have confirmed my findings.
Step 3: Time to organize. I look at the information that I want to convey to my students and begin to think about the method that would best fit this lesson.
- Are we defining something?
- Is this too much at one time?
- Do I need to break this into mini lessons with guided and independent practice loops? (That's what I did for special right triangles this past year and it worked out great.)
- What will this journal page or foldable contain?
- Will it define and organize the concept, contain a reusable manipulative, be the result of a paper folding activity or lesson, a reference of guided practice, or all of the above?
- What is the point of this journal page and how will it benefit my students?
Once I decide the purpose, I then begin to look for or create a foldable that will organize the information and lesson into sections.This is important to me. I like information to be organized, sectionalized, bolded, boxed, highlighted, etc. Kids tend to remember things like that. A lot of times, we'll end up with glued attachments here and there to accomodate new information or make a little more room.
I can't really explain how I come up with my lesson. I've been told that my wacky brain is hard to follow. Sometimes, the lessons are from colleagues, workshops, or previous experiences that I tweak to fit my agenda. My goal on each journal page is to take an overload of information, organize it, and make it relatable to my students. If you've read previous posts, you'll see where I ask for suggestions on how to make a journal page better.
I'll admit, I am not always this on top of my lessons. Sometimes, I walk in knowing what I need to teach, but not how. My go to "don't know where to start" strategy is to go with a blank white sheet of paper. My students know to use my go to short fold half page foldabable. It's boring but I can expand this, glue attachments, glue it like a pocket for additional stuff, and initially this simple foldable provides three sections for attempting to organize. I use this foldable alot, even if we're not writing much. I don't want to run out of room. (Occasionally, I come up with nothing. I turn to a printed paper lesson. We glue together like a book and then into our journals.)
During the past year, my geometry class actually wrote on a lined page in the journal.... twice maybe. There's never enough room and I like to contain a concept to one page. We actually used 90 of the 100 sheets in the composition book. I did only use the front side, but hope to use the back/opposing side as a reflection, sentence stem, summarizing, something page.
Step 4: Once I know how I want to organize and relate, I create a quick disposable mock up of what I plan the journal page to look like. I scribble an outline and notes to self. This is usually something that I use as a guide to keep me on track and throw away later.
Step 5: (optional) Sometimes, I create a pre fab printable foldable template. This makes journaling go much faster and students are less likely to fall behind or make mistakes. I usually have one foldable completed to show students what we're trying to make. Some students are quick to figure it out and begin to help others. I use solid lines to indicate folds and dotted lines to indicate 'cut here'. This strategy can save time by having the students write less and provides structure to help them better organize the information. However, I am a huge advocate of students writing! I think my students have learned more this past year than the previous two because they wrote everything. I rarely printed definitions, diagrams, illustrations, proofs, etc. It was sometimes hard, but my students were better off. Watching them draw platonic solids and cross sections was entertaining, but extremely difficult. I did give in in the end and printed them off. However, anytime I print something off, I still require students to participate by highlighting, fill in the blank, notating, etc.
Step 6: I teach the lesson. I try to make every step of the process engaging and mathematical. I ask open ended guiding questions before, during, and after the creation of the journal page. (I have developed excellent wait time. It was hard, but I'm quite proud of that.)
Even the foldable itself is a mini math lesson. I try to use mathematical language when referencing folds. It took about half a year to come up with new terms for hot dog and hamburger fold. Actually, a student suggested long or short half fold and I've used it ever since.
One time in geometry, I needed the students to fold a blank piece of paper to get sixteen boxes. They recognized a pattern in the words I was using - one half, one fourth, one eighth, one sixteenth. It turned into a mini lesson on exponential functions.
Is this strategy full proof? Absolutely not! I usually change a journal page up year to year, class period to class period. My students are my guiding force, and they let me know what works. Someone once told me that you have to learn to teach students and not just teach a curriculum.


